Friday, 21 October 2011

Tutorial Nine - UV Co-ordinates Part Two

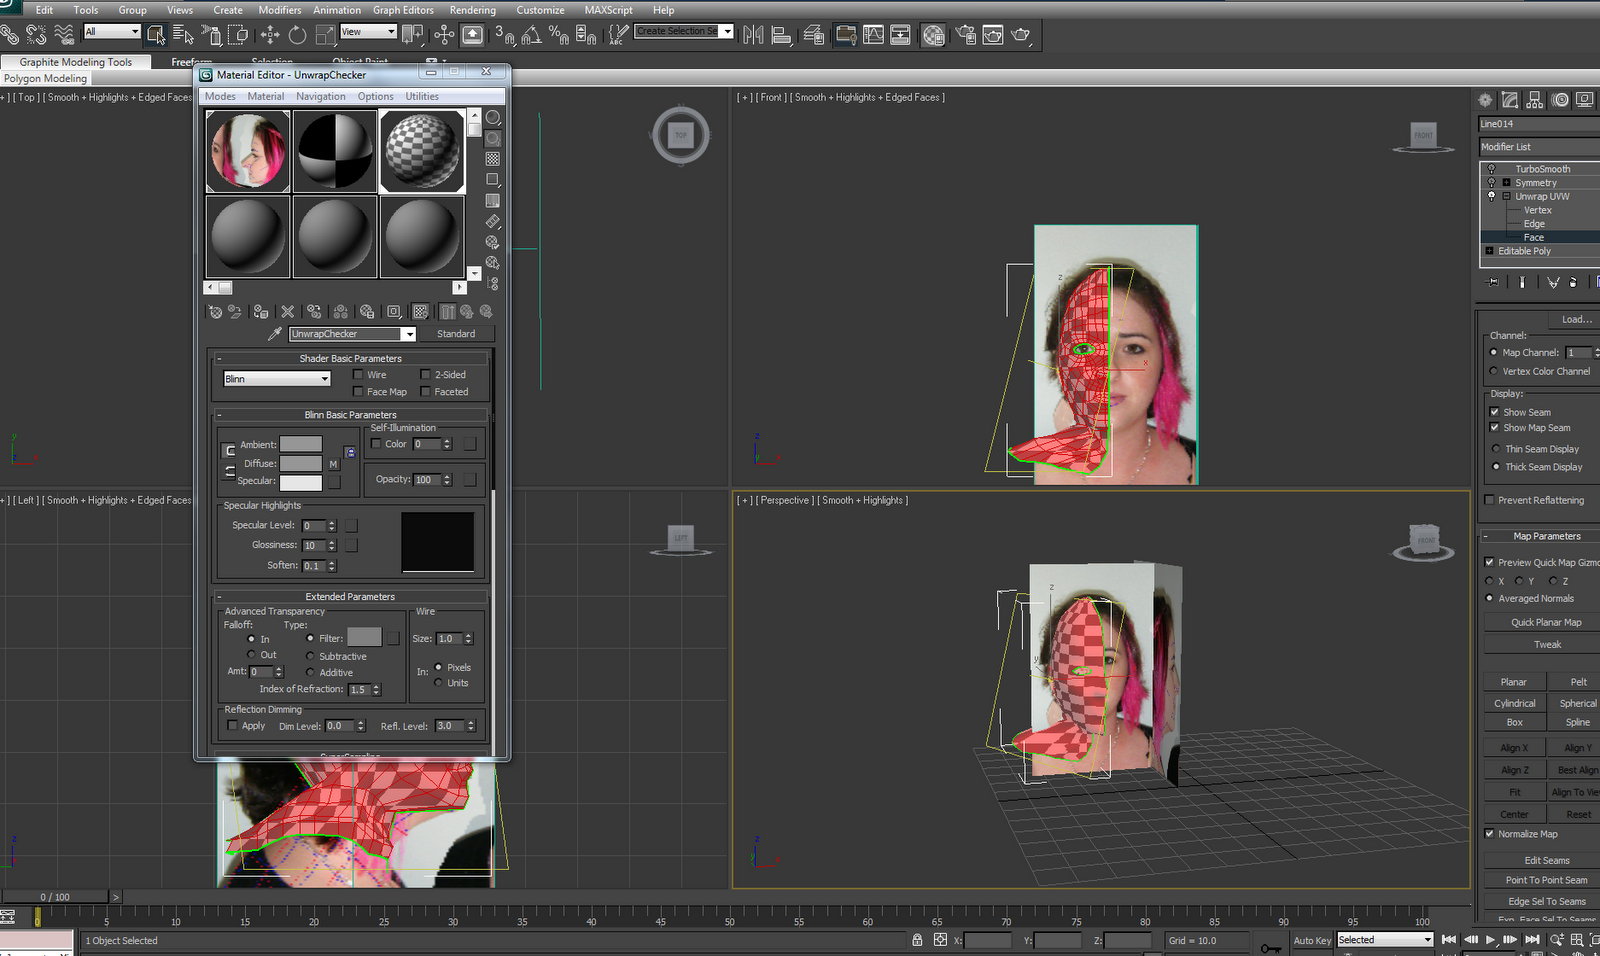
Again this tutorial was mainly focusing on the ear which I had not completed, however I did get some extra useful parts from it. Above the Symmetry Modifier I added another UVW Modifier. I then went into edit parameters and copy and pasted the mirrored side into my edit UVW. I went on to weld them together down the centre seam and fit them to the blue box. I then rendered my completed UV with the aspect ratio width of 2048x2024.


Tutorial Nine - UV Co-ordinates Part One

To start my UV Co-ordinates I added a UVW Modifier to my model. In face, sub object mode I used the paint tool to go other the selection. Then, under map parameters I selected the cylindrical method and aligned this to achieve the correct orientation. As the mesh was not within the cylindrical gizmo, I scaled it to size. I then came out of this mode and applied a checker pattern to my mesh using material editor. The checks should be square so to achieve this I went into the edit mode under parameters.

This allowed me to modify my UVW Map, making sure that there were no complications with the head. Luckily I only had two trouble areas, the first was a vertices at the top of the head, this was simple to fix and I just moved it back into position. The second trouble area was the nose and this was mainly because of the extrude used to make the whole in the nostrils. I did try to untangle it so it did not flag up red but there were still a few faces highlighted. To relax the edges I selected the chosen area and used the relax tool to relax the edged angles. Finally to finish this section I chose overlapped faces and selected faces to make sure there were no hidden overlapped faces.

Tutorial Eight - Ear Creation

As mentioned in my previous blog I was unable to obtain a reference for my ear and therefore left this part of the process out. I do feel that I would like to try and model an ear as a lot of peers had said it was difficult and akward. I feel as though I have learnt some new skills over using these tutorials and these could have been put to the test. Unfortunatley I had no ear in my reference planes and I did not have time to start again with new images.

Tutorial Seven - Primitive Extension

I will now go on to use primitives to improve the geometry of my model. I went back into Photoshop to add more topology to the left view reference; I used the same method as before and used distinctive wrinkles etc, to define where my topology should sit. As a lot of my hair was covering this I found it very difficult and had to assume where the lines would be. I then went back into 3D Max and updated my reference planes. Once completed I began to model again, starting with creating a sphere to use as the top of my head.  I moved the sphere over my head and placed it where I felt it lined up best. I then went on to orientate the poles of the sphere by using the rotate option so that they were showing at the side. Once this was done I was able to line up the edges with those of my head, decreasing the segments to match, this would allow the welding of those edges to be completed far quicker.


The next stage was to get rid of the extra geometry. This was achieved by turning on the marquee paint selection. I painted across all of the interior quads to the side keeping a strip down the back of the head. I then did the same with the right hand side of the sphere as my model would mirror any changes. I then lined the quads up using the move tool and soft selection, snaps toggle was turned on so that the vertices were close together. To carry on the neck through and across the shoulder I held down shift and moved the edges out creating new quads. It was at this point that I realised I had no reference for my ear I therefore carried on the faces and covered where the ear would be. Unfortunately there was not enough time to complete an ear.


To simplify the geometry of the sphere I selected every other edge to the left side of the sphere, I then selected ring and then collapse within edit geometry giving a simpler form which will be easier to modify. To finish I went on to target weld the vertices of the head and sphere.
 

Thursday, 20 October 2011

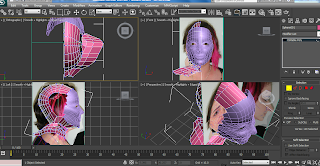
What has been produced so far...

Everything seemed to be running smoothly until I went on to create my nose which caused a few problem areas. This was a section on the head in which I had too many quads resulting in a lot of editing and re organising. This did take some time and unfortunately I am still not pleased with the outcome, however I probably would of had to of started again to get the best result.

Tutorial Six - Refine Techniques

It was now time to add more detail to my model, starting with my nose. Under editable poly I was going to create more edges to the outside of the nostrils. By selecting the edges and holding down shift it created a copy, I did this with several edges at the same time. It was here that I realised I had to many edges to my nose, which then led to my “nose job”. I decided that in order to get the best shape for my nose as possible I would need to remove two of the quads that I had originally created. To do this I simply selected the edge which was separating the quads and removed it. I repeated this with the edge next to it, this gave me two quads instead of the original four which when it came to creating the nostrils, made my life much easier.

Before (This shows the edges which needed to be removed)

After (Once the edges had been removed giving less geometry to work with)

I used the snap toggle to align the vertexes of my inner edges to my main nose; I then selected them and welded them together, creating a single vertex.  I then had to add extra geometry as there was not enough detail. I used connect to create an edge to join the edges I had already selected creating an additional loop. The first quad to my nostril had now become five sided as the loop ended at its left edge. To change this back to a quad I used the cut tool and separated it into two quads. When it came to filling in my nostrils I realised I could only make one quad from the nostril shape, the other would have been a triangle. To rectify this I added an extra edge using the connect tool again, this ran from the bottom of the nostril to the top of my lip. Using the create button I was now able to draw two polygons for the nostril.


I then went on to play around with the outer nostril vertexes to give my nose a better shape. I was glad that I managed to rectify the inner nostril polygons as I also extruded them up into the nose to give a more natural inner nose. After I had finished my nose I used the same techniques that I had learnt from building it to create my lips (this went much easier!).


Tutorial Five - Symmetry Subdivide

Now that I had shape to half my face, I needed to make it a whole face. To do this I applied a symmetry modifier to the first half of my face. Initially the symmetry modifier was oriented the wrong way, to change this I flipped it, but it was too close to the original half of my face. To be able to move it I chose the mirror on the sub menu for the symmetry modifier, this allowed me to position the second half of my face where it should be. Now I was able to change the original half of my face and it would mirror the same changes on the second half, thus resulting in less work and time being put into changing both sides. As I wanted to see the changes take place to the second half of my face as well, I turned on the show end result within the modifier. To smooth certain parts of my face I turned on NURMS sub division within edit poly. This allowed me to smooth round the areas of my eyes as they were showing as quite far out. After this I turned off NURMS subdivision to get back to my low poly cage. I then added a TurboSmooth modifier as this would give me much more predictable results.