I should have applied more time to creating a better face but unfortunately that was not possible. the modifications that I have made did make an improvement on the face compared to what it did look like.
I still don't think my nose looks right and as I said in my previous post, if this had more polygons then I believe it would have been easier to change.
I had not changed my mouth which is pouting this is something that I did want to get done.
I am happy with the material around my eyes. My eyebrows are placed well and now that I have changed my face shape it does look much better. I probably would have started again if I had more time. The topology around my cheeks is fine but I would have wanted to change it for my nose and mouth.
Friday 9 December 2011
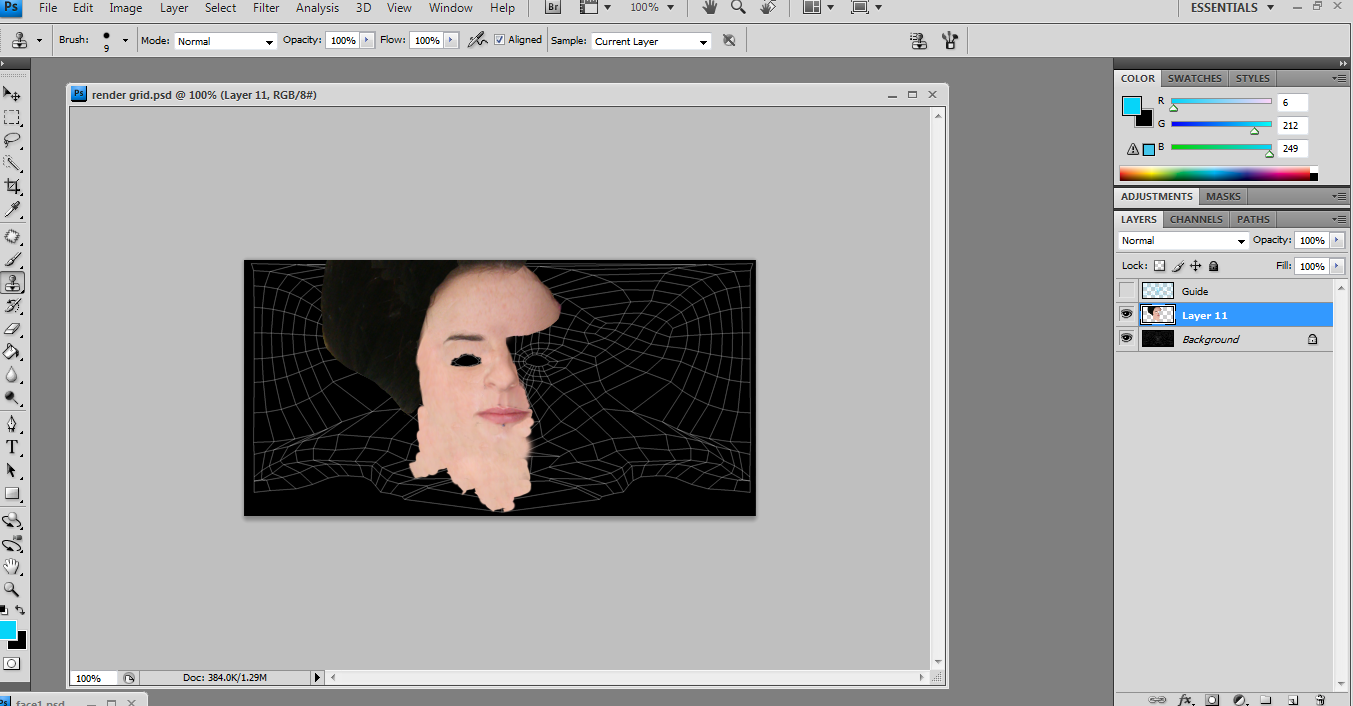
Modified Nose and Cheeks
The nose that I originally had was not quite the right shape. I have tried to modify this but I'm still not convinced it looks quite right. the problem I am having is with the nostrils. After moving them around I still appear to get the same shape.
Below I are screenshots of how it had been modified:


My cheek bones are very prominent which they are not in real life. I moved the face out a bit to make it plump.
Below I are screenshots of how it had been modified:


I think it is possible that my original topology does not have enough polygons around nose, limiting me with its shape.
My cheek bones are very prominent which they are not in real life. I moved the face out a bit to make it plump.
Friday 21 October 2011
The Final Result
Unfortunately I am not very good with 3D Max, however I did try my best with these tutorials. Initially I found them very easy to follow but when it came to the more detailed parts I felt he skipped over them. My outcome is reasonable but compared to my peers' outcomes such as Alex Chapman it looks terrible. It didn't seem to end up looking like me in any way. I would say I definitely need more practiise with 3D Max but I have learnt quite a few new skills going through these tutorials which is always a bonus!

C'est la Vie!
Tutorial Twelve - Specular Painting
Applying general specular level of glossiness does not allow the freedom of choosing where you want the shine to be. To achieve this I took the bump map, copied and renamed and then adjusted the levels under the image drop down. The levels were darker than the bump map. I then took the brush tool, made the colour white and made sure it was lighten. I then started to paint the forehead, lips, tip of the nose, all the places where I would consider the face to be shiny. I then went to filter and used the Gaussian Blur under the blur drop down. This gave a smudged effect. I then applied it as a material on my model.

Tutorial Eleven - Bump Painting
Using the previous colour map I will create a bump map. Firstly I desaturated the image under the adjustments and image drop down, I also changed the levels in these drop downs too. Next I completed the high pass under the filter drop down, this gets rid of a lot of the shading, I set the radius to 2. I went on to use the clone stamp to get rid of the seam and bossing effect. Once this was completed I added it to my material editor in 3D Max and adjusted the bump and noise settings to give a natural bump in the skin.

Tutorial Ten - Texture Painting Part Two
In this tutorial I used the normal information which I exported at the same time as the UV lines. The colours show which way each surface is facing. I copied the normals into a new layer and then changed my action process so that the normals layer also shows as hidden. I used bright green to round the inside of the eye, nostrils and mouth. It happened that my texture was up to the green guide lines and so I did not need to change it.

Tutorial Ten - Texture Painting Part One
It was now time to move back to using Photoshop in order to give some texture to my model. I opened my rendered UVW Map as I will use this to guide my painting. I created a new layer and named it guide; I then chose bright blue as this will stand out within the texture. I then chose fill to add this colour to my new layer. I then selected the image and copied it. To achieve quick mask mode I selected the blue layer again and switched it to quick mask mode, and pasted the black and white image into it. This then only showed the white outline with the blue background, when zoomed out it was very hard to see the lines so I made them thicker by modifying the border under the select drop down. I changed the width of pixels to four. I then clicked the add layer mask which preserved what was selected (the lines) and removed everything else. To finalise the layer I applied the layer mask.
I went on to open my topology files so that I could take parts from the face and start to build up my texture starting with the forehead and finishing with the chin. Using the lasso tool I selected areas that I had copied and gradually built up more of the face. I also used the clone stamp and patch tool to smooth out the colour variations.
To make sure that the texture guide didn’t load when in 3D Max I created a new action and called it Texture. This meant that Photoshop would watch everything I did, I then hid the guide layer and saved, once this had save I hit stop – this meant that every time this would load it would automatically hide the guide layer I went on to check back and forth on my texture in 3D Max. It was doing this that I noticed my lip was slightly higher than it was supposed to be. To change this I used the liquify tool which is found under the filter drop down. It allowed me to smudge pixels to where I needed them to be.

Subscribe to:
Posts (Atom)