To start my UV Co-ordinates I added a UVW Modifier to my model. In face, sub object mode I used the paint tool to go other the selection. Then, under map parameters I selected the cylindrical method and aligned this to achieve the correct orientation. As the mesh was not within the cylindrical gizmo, I scaled it to size. I then came out of this mode and applied a checker pattern to my mesh using material editor. The checks should be square so to achieve this I went into the edit mode under parameters.

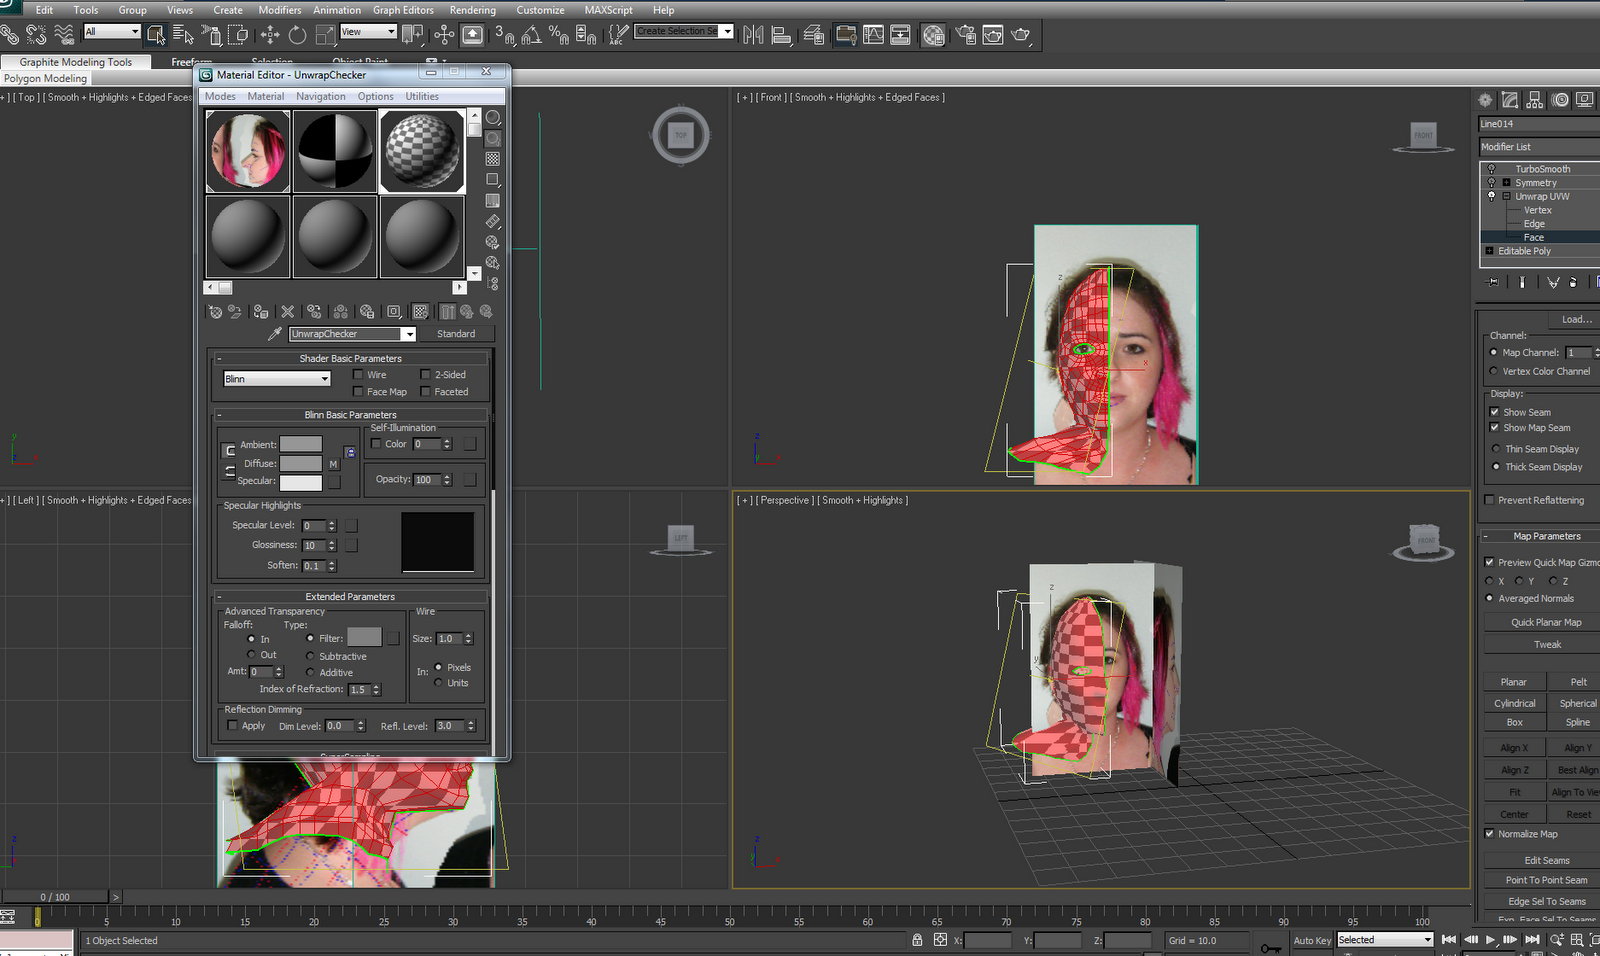

This allowed me to modify my UVW Map, making sure that there were no complications with the head. Luckily I only had two trouble areas, the first was a vertices at the top of the head, this was simple to fix and I just moved it back into position. The second trouble area was the nose and this was mainly because of the extrude used to make the whole in the nostrils. I did try to untangle it so it did not flag up red but there were still a few faces highlighted. To relax the edges I selected the chosen area and used the relax tool to relax the edged angles. Finally to finish this section I chose overlapped faces and selected faces to make sure there were no hidden overlapped faces.
No comments:
Post a Comment